Bloggers usually become passionate about building their website. But, they mostly lack the technical understanding of a fully functional website.
Although there are various blogging platforms, only WordPress stands out as an effective CMS for creating a blogging website, keeping in mind the long-term goals.
This is why, we’ve come out with this tutorial on how to create a blog website in Gutenberg in 11 simple steps.
Contents hide
2 Creating a Blog Website in Gutenberg – 15 Easy Steps for Beginners
2.3 (3) Choose your Gutenberg Theme
2.4 (4) Pick Gutenberg Page Builder
2.5 (5) Vital Gutenberg-based Blocks
2.7 (7) Customize with Blog Templates
2.9 (9) Start Publishing Blog Posts
2.10 (10) Promote Your Blog in Social Media
2.11 (11) Set up a Monetization Plan
3 Best Practices for Making a Gutenberg Blog Website
4 How to Make a Free Blog Website in Gutenberg?
What is a Blogging Website?
Blogging is no longer just about writing an online diary, it has been a revolution over the last 2-3 decades. Every day, bloggers publish nearly 7.5 million blog posts, reaching over 409 million readers each month. There are many professional websites that publish informative blogs based on specific niches while maintaining a strong editorial policy.
Almost every business, corporate, e-commerce, finance, professional, or personal portfolio website usually maintains a separate blog section. However, by a blogging website, we mean a type of website that is dedicated to constantly creating and publishing blog content on single or versatile topics. Even if you visit the homepage of such a website, you’ll see a list of blogs.
Now, many blogging platforms exist like Bloggers, WordPress, Tumblr, and Blogspot. However, WordPress should be an obvious choice for beginners due to its flexibility and affordability.
Up next, we’re showing you how to create a blog website in Gutenberg.
Creating a Blog Website in Gutenberg – 15 Easy Steps for Beginners
Let’s go through the simple steps of building a blog website within the Gutenberg interface without any coding hassles.
(1) Decide a Blog Niche
In today’s competitive web world, you can’t just start a blog website with a random topic in mind. Rather, you need to know money-making opportunities, whether you’re building a personal or professional blogging site.
To select the perfect blog niche, keep these factors in mind:
👉 Interest: Pick a topic you’re genuinely interested in.
👉 Traffic Potential: Ensure there’s an audience actively searching for content in that niche.
👉 Keyword Competition: Aim for a niche with low keyword difficulty to easily and quickly rank in the SERP.
👉 Monetization: Have a clear understanding of generating income from the chosen topic.
Sometimes, your passion may revolve around a broad topic. And, you can go for that as well. Here, one hack is finding a unique approach to target your audience. For instance, you can focus on a specific subtopic within a vast niche and produce tailored content. By doing this, you can gain success in a short time.
Another benefit of this strategy is that you can build a strong relationship with readers. So, it will be easy to convince them to click on a referral link.
(2) Buy Domain & Hosting
Doesn’t matter what type of website you’re building, the first step is to register a domain name and sign up for a web hosting service.
A domain is your blog’s unique name that helps both visitors and search engine bots identify your website. On the other hand, hosting platforms save your website’s assets—including text, visuals, video content, database code, etc. Essentially, hosting is like a home for all your website content.
There are several domains and hosting selling services available. Since you have already decided on your blogging platform as WordPress, I would recommend you go with a built-in WordPress installation option. For example, if you go with the Bluehost hosting service, you can easily launch and install WordPress to your site from its Account Manager Dashboard.
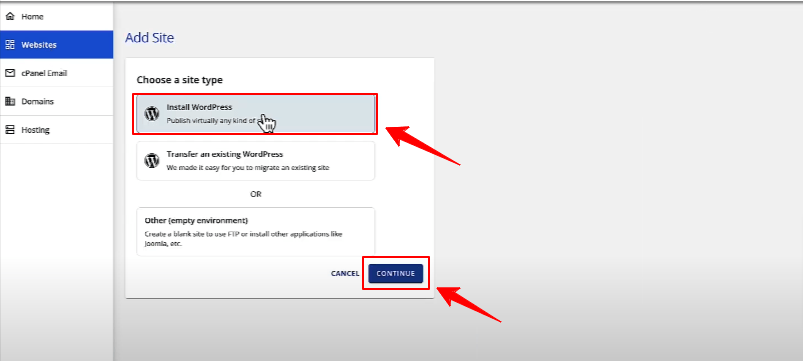
Then, you can directly land your WordPress dashboard and start customizing.
(3) Choose your Gutenberg Theme
At this point, you need to choose a Gutenberg block theme to set the appearance of your blog website in the block editor. These kinds of themes provide the flexibility to apply styling and customization through an intuitive, template-driven interface. This means you can independently edit each post or page, from header to footer and everything in between.
It eliminates the dependency of going through traditional WordPress theme settings like customizer, menu, and widget. And, a suitable FSE (Full-Site-Editing) compatible theme is “Hello Blocks”.
This aesthetically pleasing but lightweight theme is free to use. But, the important part is this block-editor-based theme is compatible with GutenKit– a comprehensive page builder tool for Gutenberg users and a must-needed tool for building a blog website in Gutenberg.
Let’s know about the plugin more.
(4) Pick Gutenberg Page Builder
Gutenberg offers a set of basic blocks for building a blog website, including titles, paragraphs, quotes, images, spacers, video embeds, and more. By using these you will end up with an ordinary look for your blog posts.
To make your blog more interactive and functional, and to stay competitive in the evolving web landscape, you’ll need the support of a Gutenberg page builder. And, we already mentioned the GutenKit – a no-code visual builder to build multipurpose WordPress websites.
It can help you customize and style your blog website within the Gutenberg interface with exceptional blocks, modules, and pre-made templates. For example, the nav menu block allows you to show subtopics of your chosen niche in a multi-level header navigation.
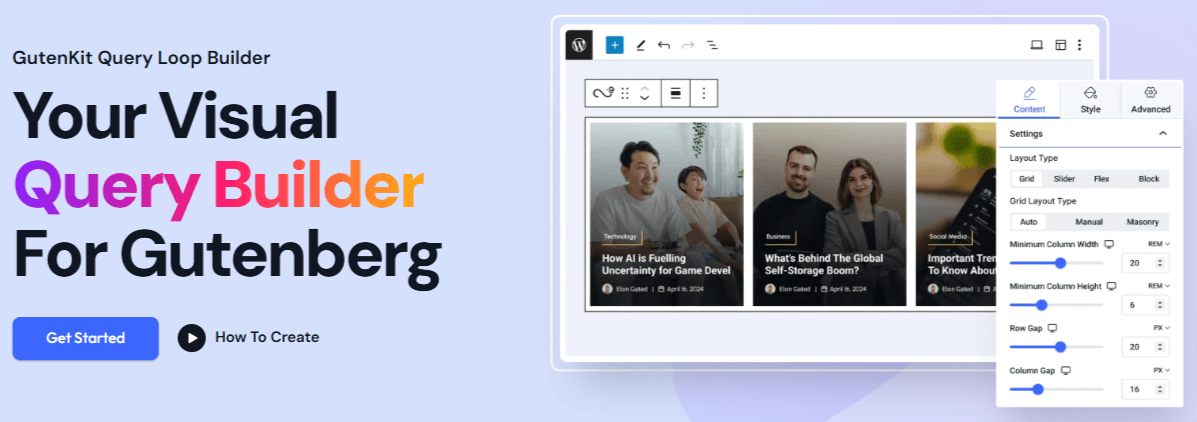
Personally, I find the Query Loop Builder block by Gutenkit to be the best feature for a blogging website. This feature isn’t commonly available in Gutenberg-based plugins. Bloggers can easily organize and showcase blog posts according to different parameters and taxonomies.
Nowadays, blogging isn’t boring anymore with long chunks of paragraphs. Rather, modern blog sites tend to show attractive motion effects to engage their readers better. You can use the various animated features of GutenKit like parallax effects, motion effects, on-page scroll, glass morphism, and interaction module.
As a blog content creator, making a responsive website can be hard for you. Gutenkit provides a solution here too, using its preset breakpoints to ensure proper fitting of your website on any screen size.
Another hard task for beginner bloggers is optimizing the website speed. But, there isn’t any alternative to choosing a lightweight WordPress theme and page builder plugin. The combination of Hello Block Theme and GutenKit can be effective here.
(5) Vital Gutenberg-based Blocks
Since we know Gutenberg is a block-based design system, we need to know some essential blocks that have the power to create the blogging website of your dreams.
✅ GutenKit Container: Easily structure a responsive layout to showcase content.
✅ Heading: Default Gutenberg heading to introduce a new section, here you can set H1, H2, H3, H4, etc.

✅ GutenKit Heading: Get advanced heading animated and styling to showcase other information like subtitles & descriptions attractively.
✅ Paragraph: Another commonly used default Gutenberg block to format your text content.
✅ GutenKit Advanced Paragraph: Included with extensive text customization features to give an appealing look to your text content.
✅ Button: Place this block to drive your visitors to the targeted page or URL. Alternatives are GutenKit’s Creative and Dual Button blocks.
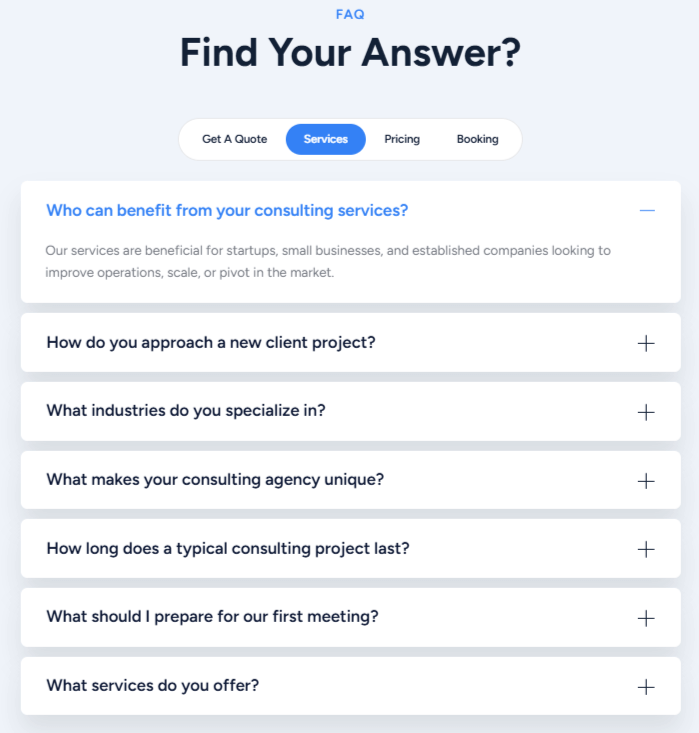
✅ GutenKit FAQ: Give bite-size answers to the frequently asked questions effortlessly.
✅ GutenKit Drop Cap: Stand out the first paragraph of an article or post by enlarging its first letter with a different color.
✅ GutenKit Back To Top: Enable your visitors to easily navigate back to the top of the page when publishing long, scroll-heavy content.
✅ Video: Default Gutenberg block to show video by embedding links from external sources or uploading from your device.
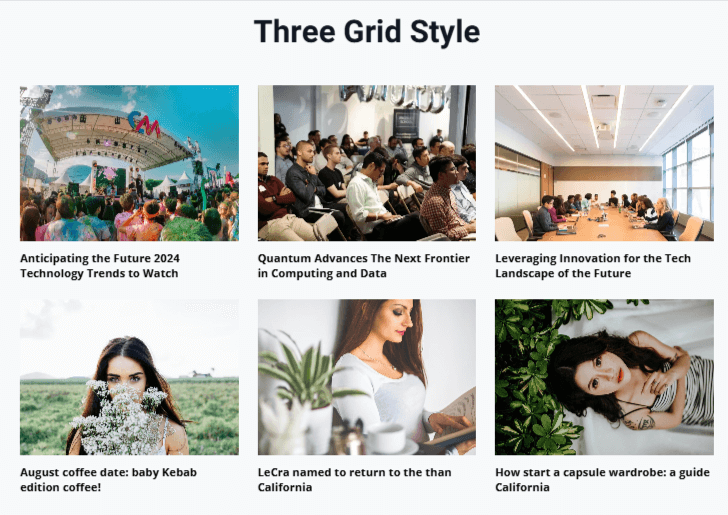
✅ GutenKit Post Grid: Display the featured blog posts or a special category using a grid layout.
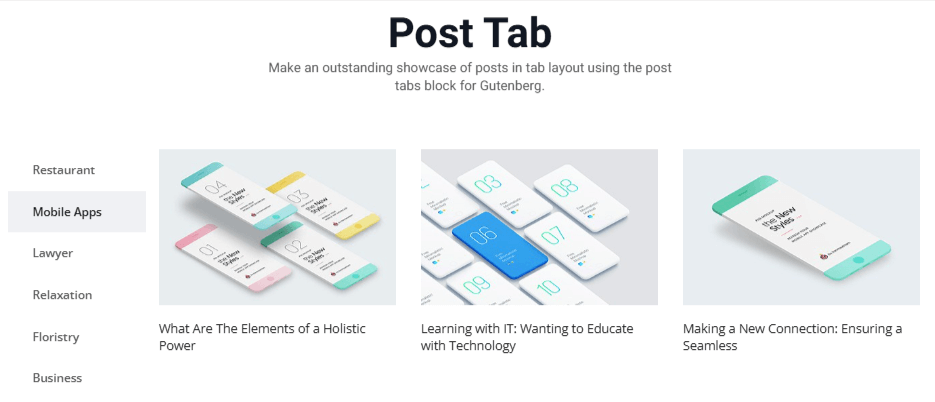
✅ GutenKit Post Tab: Add vertical and horizontal tabs to show your blog posts according to different categories.
✅ GutenKit Google Map: For showing any location info embed and show Google Maps.
✅ Image: Native media block to upload images or GIFs.
✅ GutenKit Advanced Image: Add images with various motion effects and captions.
✅ PopupKit: Create appealing popup templates and function with smart triggers.
✅ GutenKit Fun Fact: Showcase data and number info in a fascinating way.
✅ GutenKit Unfold: Present larger text content in a compact area to save the web space along with an option to expand the full article.
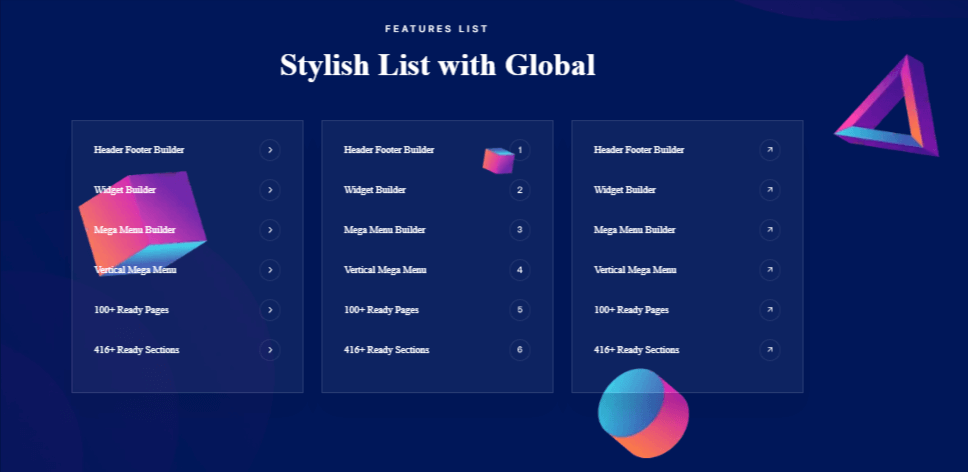
✅ GutenKIt Stylish List: Make your blog post more informative with a fully customized list.
✅ Spacer: Default block to add space between two blog content.
✅ GutenKit Dynamic Content: Show blog post content dynamically to give a personalized experience for visitors.
✅ GutenKit Query Lopp Builder: Organize content based on different post taxonomies and parameters.
✅ GutenKit Display Conditions: Set conditions to display specific content exclusively to certain audiences, such as subscribers or premium visitors.
(6) Must-Have Web Pages
From your WordPress dashboard, navigate to Pages > Add New to insert a page on your website. And, following pages are mandatory for your blog website.
➡️ Homepage: This is the page where visitors get a clear understanding of your website’s goal. Many bloggers like to show their blog posts on the first page. However, by keeping a separate home page, you can keep a lead generation form, achievements, readers testimonials, etc.
➡️ Blog Page: Some renowned websites also label this page as “Ärticles”. Give a unique and intuitive look to show your blog posts. Highlight the recent blog post in a larger viewport.
➡️ About Page: Explain your brand’s vision, accomplishments, history, and personal expertise for better accessibility of your website.
➡️ Product, Course, or Service Pages: Most bloggers don’t think about any such pages. But, depending on the monetization method, a blog content creator can have a separate page to sell their product, course, or service.
➡️ Contact Page: The contact page is mandatory for any website. Many people want to collaborate with you for different purposes. Having a contact page ensures you’re always accessible and connected to your audience.
Further, there are different pages like 404 page, Privacy Policy, Cookie Policy, Refund Policy, Career Page, and many more. It depends on how you want to structure your blog website.
(7) Customize with Blog Templates
Now, you know what pages you need for your blog website. You can create and customize them from scratch. But, one time-saving method would be using pre-made page templates, If you use the GutenKit page builder, it has some awesome & professionally designed pre-made templates library.
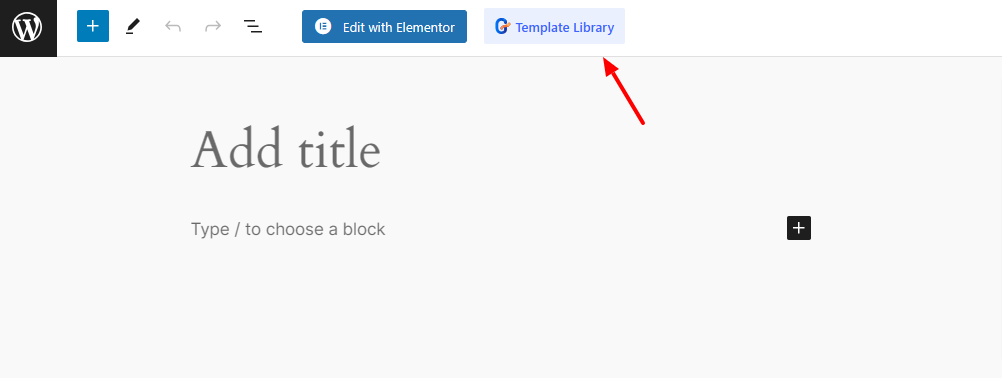
Here’s a practical workaround: make sure the GutenKit plugin is installed on your WordPress website. Then, create a new page or start editing an existing one, you’ll see the “Template Library” button, just click it to open the GutenKit pre-made layout library screen.
Here, you’ll find an entire blogging website template or you can choose a page or section individually to create your website. Once the GutenKit templates are fully loaded on the website, you can edit the content and other styling parts to match your brand needs.
(8) Create Blog Visuals
For running a blogging website, you need different kinds of visuals like feature images, inner images, and other informative infographics assets. Adding visuals can be 94% more likely to get views than those that don’t. Even, modern blogging practice requires video content for making blog posts more engaging.
For larger blogging websites, owners will need to hire a graphic designer to complete these visuals. If you’re starting new and need a lower number of visuals, you can do it on your own. Another way is using an AI-powered image generator tool, particularly for someone who wants a large number of visual assets with no graphical knowledge.
For WordPress users, using an AI-image generator plugin like Genie Image helps to automate the image creation within the dashboard. It is developed with OpenAI DALL-E 2 to create realistic and higher-resolution images.
(9) Start Publishing Blog Posts
Once your blog articles and visuals are ready, the only thing you’re left with is publishing the blog post. To run a professional blogging website, two key factors are essential: maintaining a consistent publishing schedule and implementing a thorough editorial process to ensure quality and completeness.
Keeping the same time interval between publishing blog posts can have a positive impact on your site’s SERP ranking and recurring visitors. Also, create a blog content calendar and complete the blog writing before the publishing date.
You should also assign an editor and use a checklist to ensure all necessary steps are completed before publishing content.
To publish a post, go to your WordPress dashboard and follow: Posts > Add New Post, on the next screen, add your blog post content and make all the necessary formatting and customizations.
Then, preview the blog post, and if there are no issues, publish or schedule the post.
(10) Promote Your Blog in Social Media
After publishing blog content, it’s crucial to ensure that it reaches a broader audience. Since social media is an effective channel for attracting new web visitors, you need to share your blog posts with various social groups and forums.
Additionally, create social media profiles on platforms like Facebook, Instagram, and Twitter using your blog’s name to build your brand presence. Most importantly, make it easy for your existing readers to share your content on their social networks,
To do this, you can use GutenKit’s Social Share and Social Icon blocks. You can show a stylish social share button and icons to motivate visitors to share your blog.
(11) Set up a Monetization Plan
Making a comprehensive blog website requires your investment, sweat, and blood. So, you deserve to earn some profit by monetizing it. You can set a strategy with multiple streams of earning. Let’s see how you can diversify the profit channels with your blogging website.
💰 Display Advertising: This is by far the most common method of earning through a blogging website. You can display Google ads, sell web space to any brand for showing ads, and join an ad network like Mediavine or Ezoic.
💰 Affiliate Marketing: By promoting products or services related to your niche and getting commission after a successful transaction.
💰 Sponsored Post: It’s a way of paid guest posting, where you publish a blog related to the partnered company’s products or services.
💰 Launch Paid Course: Become an expert in a niche and build authority with your blogging site. Then, use this reputation and make paid courses by targeting your visitors.
💰 Sell Digital Products: Come up with ebooks and other exclusive digital materials that your visitors would like to purchase.
💰 Membership or Subscription Models: If your blog website gets huge popularity and demand, you can plan for a premium membership model.
Further, you can think about other monetization plans as well. Here, the best practice is to analyze the audience group of your targeted niche and develop the monetization strategy accordingly.
Best Practices for Making a Gutenberg Blog Website
The tips below will help you improve various aspects of developing a Gutenberg-based blogging website.
🔶 Save time with reusable blocks. Gutenberg supports the reusable blocks feature, eliminating the need to create the same customization.
Ease your blogging journey with pre-made layouts. Make your blog design faster and easier by uploading a pre-designed layout.
🔶 Know how to use core Gutenberg blocks better. You may have to deal with a range of different Gutenberg blocks throughout your blogging journey. But, there are some which you need very often.
🔶 Structure your blog format for better interactivity. Make appropriate utilization of various design elements like headings, sub-headings, lists, images, tables, videos, etc to give a clean and organized layout of your blog page.
🔶 Get done with SEO optimization. Having a written draft that has followed all the SEO checklists such as strategically adding relevant keywords in paragraphs and titles, optimizing meta descriptions and image alt text, maintaining natural readability, ensuring fast-loading pages, inserting internal and external links, etc can bring better SERP rankings.
🔶 Know where your target audience meets online. Reach your potential visitors through various social platforms, online meetups, and other virtual connections.
🔶 A clear understanding of your objectives. This is something you should have clarified before starting your blogging website. This could include defining audience audience targeting ways, monetization methods, traffic generation, content creation, or any specific outcomes.
🔶 Generate content with AI. Automate blogging workflow with the power of AI. There are some AI content writing tools and SEO tools, and some even work within the WordPress dashboard like GetGenie AI. You can easily create fully human-like blog posts or any type of content in no time.
That’s it! Some pro-level tips to make your blogging journey smoother and faster with a Gutenberg website. So, start taking action now. And, do you want to start your blogging journey for free? Let’s see the answer.
How to Make a Free Blog Website in Gutenberg?
You can make a free blog website in Gutenberg. However, native Gutenberg blocks are not as effective at making a blogging website attractive. The outway would be using the freemium version of the GutenKit page builder. Plus, the Hello Blocks Theme is all free.
GutenKit dynamic and animated blocks are only limited to the pro version. But, it still has a good amount of creative and design blocks to create an entire blogging website.
Wrap UP!
That was our simple guide on how to create a blog website in Gutenberg. Bloggers can now easily create a lightweight website within a block editor using state-of-the-art design functionalities.
You don’t have to work with a single line of code while customizing top to bottom of your blog website. If you encounter anything while creating your dream blog website, ask in the comment box.

Leave a Reply